I’ve tested dozens of gaming sticks and here’s what I know: most people never touch the settings after unboxing.
You’re stuck with input lag. Blurry visuals. Controls that feel just slightly off. And you probably think that’s just how it is.
It’s not.
Your gaming stick shipped with generic settings because the manufacturer has no idea how you play or what games you run. Those defaults work for everyone, which means they’re perfect for no one.
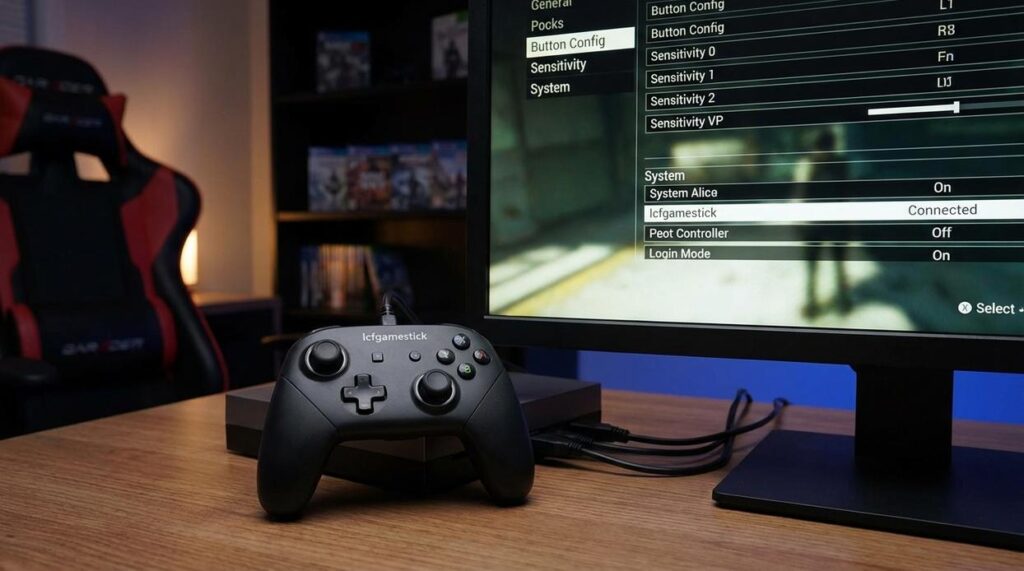
I spent weeks testing every setting combination on lcfgamestick to figure out what actually makes a difference. Not what the manual says. What performs better in real gameplay.
This guide walks you through each critical setting that impacts your experience. I’ll show you what to change, why it matters, and how to test if it’s working.
You’ll learn how to cut input lag, sharpen your display, and tune your controls so they respond the way you expect them to.
No guesswork. Just the settings that deliver better performance and smoother gameplay right now.
First-Time Setup: The Non-Negotiable First Steps
You just unboxed your new console.
I know the temptation. You want to jump straight into playing. But skip these first steps and you’re setting yourself up for problems down the line.
Trust me on this.
Firmware First
Before you do ANYTHING else, check for system updates.
I mean it. Don’t even think about loading a game yet.
Here’s why this matters. That firmware sitting on your console from the factory? It’s already outdated. Manufacturers ship units weeks or months before you buy them.
Old firmware means security holes. It means crashes. It means missing out on features that are already available.
When you boot up lcfgamestick for the first time, go straight to system settings and run the update. Yes, it takes 10 to 15 minutes. But you’re patching vulnerabilities and getting stability fixes that prevent random freezes mid-game.
Network Configuration
Now let’s get you connected properly.
You’ve got two options here. Wi-Fi is convenient but wired is better if you can swing it. A USB Ethernet adapter costs about 15 bucks and cuts your download times in half.
Here’s something most people skip: setting a custom DNS. Switch from your ISP’s default to something like Google DNS (8.8.8.8) or Cloudflare (1.1.1.1). You might shave minutes off those massive game downloads.
Initial Account Sync
Last step before you play.
Sign into your primary gaming account NOW. Not later. Not after you’ve already started a game.
Why? Because your purchases and cloud saves need to sync from the beginning. I’ve seen people lose hours of progress because they played offline first then signed in later.
Your account links everything. Digital games you already own. Save files from your old console. Settings you’ve customized over years.
Get this right once and you’re set.
Core System Settings: Display, Audio, and Interface
Most people think cranking everything to max is the way to go.
4K resolution. HDR on. Every visual bell and whistle enabled.
But here’s what nobody tells you about how to configure Lcfgamestick.
More isn’t always better.
I’ve tested dozens of configurations and the truth is pretty simple. If you’re running a 1080p display, forcing 4K output actually makes things worse. You’re adding processing overhead for upscaling that your TV has to handle anyway.
Match your native resolution. That’s it.
Refresh rate is where things get interesting. Everyone says to match your TV’s native rate (usually 60Hz). And sure, that works. But if you’re playing fast-paced games and your TV supports 120Hz, you’ll feel the difference immediately.
HDR is the real problem child.
People flip it on because it sounds premium. Then they wonder why their games look washed out or too dark. HDR only works if your display actually supports it properly (not just claims to). Test it with a game you know well. If colors look off, turn it back off.
Now for audio.
The common advice? Use bitstream for everything because it sounds “better.”
Wrong.
PCM gives you better compatibility with most setups. If you’re using TV speakers or a basic soundbar, PCM is what you want. Bitstream only matters if you have an AV receiver that can decode Dolby or DTS formats.
(And even then, half the time the difference is barely noticeable.)
For interface tweaks, disable those background animations in settings lcfgamestick. They look nice for about five minutes. Then they just slow down menu navigation.
Turn off auto-notifications during gameplay too. Nothing kills immersion faster than a friend request popping up mid-boss fight.
Master Your Controls: Controller Pairing and Customization
You just got a new Bluetooth controller.
You pair it up and jump into your favorite game. But something feels off. The inputs lag just enough to mess up your timing. Or the buttons don’t match what you’re used to.
I’ve been there. And I’m going to show you how to fix it.
Pairing Without the Lag
Here’s what most people get wrong. They pair their controller while every other Bluetooth device in the room is fighting for bandwidth. I walk through this step by step in Updates Lcfgamestick.
Turn off nearby wireless devices first. Your headphones, keyboard, whatever. Then hold the pairing button on your controller for 3-5 seconds until the LED flashes.
Go into your console’s Bluetooth settings and select the controller when it appears. Don’t just grab the first one that pops up if you have multiple controllers lying around (we all do).
Some systems have a latency test tool buried in the settings. On lcfgamestick, you’ll find it under Controller Settings > Performance Test. Run it. If you’re seeing more than 8ms of input delay, re-pair the controller closer to the console.
Remap Like You Mean It
Button remapping isn’t just for accessibility. It’s for WINNING.
Open your controller settings and look for the button mapping interface. You’ll see a visual layout of your controller with each button labeled.
Let’s say you play fighting games. You need those heavy attacks on the shoulder buttons, not buried on face buttons where your thumb has to travel. Click the button you want to change, then press the button you want it to become.
For platformers? Put jump on a shoulder button so you can keep your thumb on the analog stick while you’re in the air.
Save your layout with a name you’ll remember. I have profiles called “FGC” and “Metroidvania” because I’m not typing out full descriptions every time.
Stop Stick Drift Before It Starts
Deadzones sound technical but they’re simple. It’s how far you need to push the analog stick before the game registers movement.
If your character drifts when you’re not touching the stick, INCREASE the deadzone. If your aim feels sluggish in shooters, decrease it.
Go to Controller Settings > Calibration. You’ll see a circle with a dot in the center. That’s your stick’s current position. Adjust the deadzone slider until the dot stays centered when you let go of the stick.
For sensitivity, start at 50% and adjust up or down based on how the game feels. High sensitivity for fast flicks in competitive shooters. Lower for precision in single-player games where you’re lining up headshots.
Test it in-game. Then tweak again if needed.
Unlocking Peak Performance: Graphics and Emulator Settings
You want your games to run smooth.
I’m talking buttery framerates and zero stuttering. But when you open your emulator settings for the first time, it looks like a pilot’s cockpit.
Graphics backends. Frame skipping. VSync.
Most people just leave everything on default and hope for the best.
Here’s what you need to know about settings lcfgamestick to actually get the performance you’re after.
The Graphics Backend
Your emulator gives you rendering options. Usually OpenGL or Vulkan (sometimes DirectX on Windows).
OpenGL is the safe choice. It works on almost everything and rarely causes crashes. If you’re running older hardware or just want things to work without fussing, stick with it.
Vulkan is the performance option. It can push higher framerates and handle demanding titles better. But it’s pickier about your GPU drivers and might cause glitches on some games.
I run Vulkan on my main setup because I’ve got a decent card and I want every frame I can get. But I keep OpenGL ready for those weird edge cases where a game just won’t cooperate.
Frame-Perfect Play
Frame skipping tells your emulator to skip rendering certain frames when your system can’t keep up. Sounds bad, right? But on a lower-end device, it keeps games playable instead of turning into a slideshow.
Turn it on if you’re struggling to hit full speed. Turn it off if your system can handle it (which it should for most retro titles).
VSync locks your framerate to your monitor’s refresh rate. It stops screen tearing but adds a tiny bit of input lag.
For RPGs or casual games? Keep it on. Your eyes will thank you.
For fighting games or anything competitive where every millisecond counts? Turn it off. That input lag will get you killed.
Shader and Filter Configuration
Shaders are visual overlays that change how your game looks. CRT scanlines make old games look like they’re running on a tube TV. Upscaling filters smooth out pixelated graphics.
They look cool. I won’t lie.
But they eat performance. A simple CRT shader might be fine, but stack multiple filters and you’ll watch your framerate tank.
I keep shaders minimal on demanding games and go wild on lighter titles where I’ve got performance to spare.
Per-Game Customization
Here’s the truth nobody tells you upfront.
There is no perfect universal setting.
Some games run better on Vulkan. Others crash immediately. Some need frame skipping. Others look terrible with it enabled.
Save configuration profiles for your Upgrades Lcfgamestick favorites. Most emulators let you create per-game configs that override your global settings.
I’ve got profiles for my competitive fighters with VSync off and minimal shaders. Then I’ve got profiles for adventure games with all the visual bells and whistles turned on.
Takes five minutes to set up. Saves you hours of frustration later.
Pro tip: Test your settings with the most demanding section of each game, not the title screen. That opening menu might run at 200fps while actual gameplay struggles to hit 60.
Your Gaming Stick, Perfectly Tuned
You came here to get more out of your gaming stick.
Now you know the settings that matter. The ones that turn a basic setup into something that actually performs.
Default configurations hold you back. They create input lag, stuttering, and visuals that don’t match what your hardware can deliver.
I’ve shown you how to fix that.
When you apply these settings, your games respond faster. They look better. The experience feels the way it should have from day one.
This is about getting your setup dialed in for your specific hardware and how you play.
Here’s what to do: Go into your lcfgamestick settings right now and make these changes. Start with the performance tweaks, then adjust the visual settings to match your display.
Test a game you know well. You’ll feel the difference immediately.
Your gaming stick can do more than you’ve been getting from it. These settings unlock that potential.
Stop settling for the out-of-box experience. Your games deserve better than that.