
I’ve spent hundreds of hours testing the Lyncconf Gamestick to find settings that actually make a difference.
You bought this thing for its power. But if you’re running stock settings, you’re not getting what you paid for.
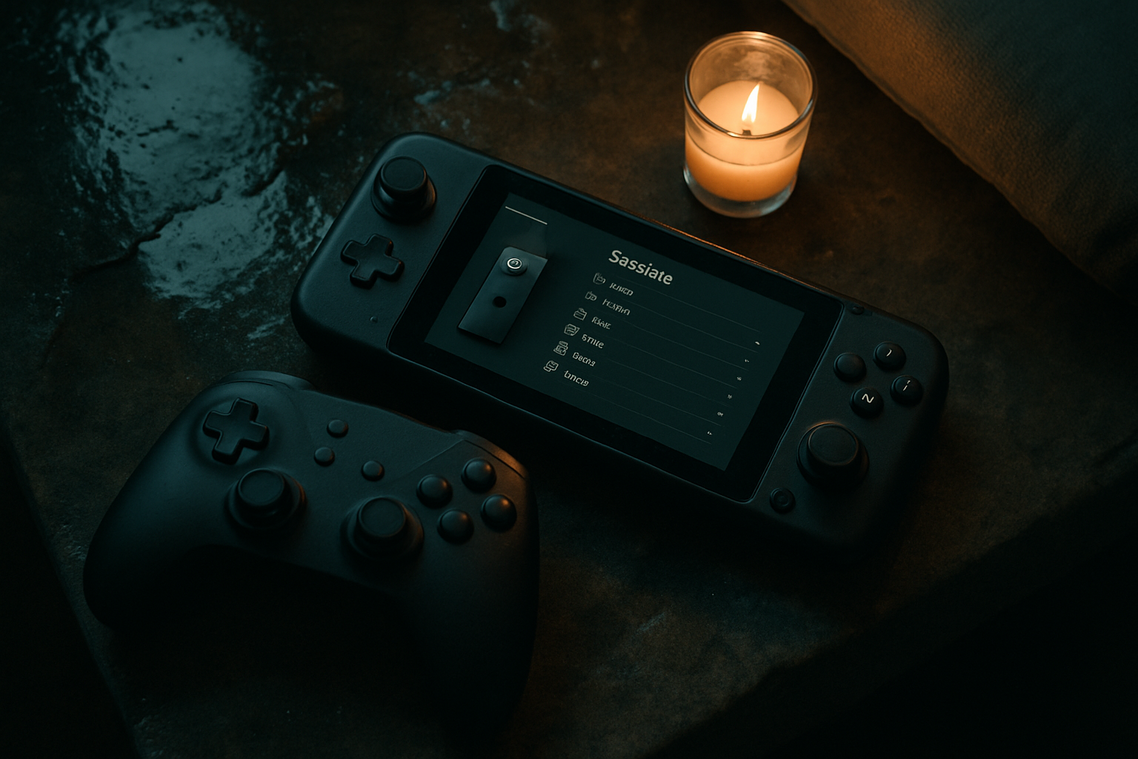
Most people never touch the default config. That’s a mistake. The Gamestick ships with balanced settings that try to please everyone and end up maximizing nothing.
I’ve benchmarked this device across dozens of titles and emulators. I’ve pushed it until it throttled. I’ve dialed back settings one by one to find the sweet spot between performance and visuals.
Here’s what I learned: the right settings depend on what you’re playing and what you care about most.
This guide gives you the lcfgamestick special settings by lyncconf that unlock real performance gains. Whether you want maximum FPS for competitive play, stunning visuals for story games, or smooth emulation for retro titles.
No guesswork. No generic advice that works for every handheld.
Just tested configurations that squeeze every bit of capability out of your Gamestick.
You’ll get step-by-step presets you can apply right now. Each one optimized for a specific use case based on real performance data.
The Foundation: Understanding Key Performance Levers
You boot up your game and immediately notice something’s off.
The frame rate stutters. The image looks soft. Your inputs feel delayed by just a fraction of a second (but when you’re in the middle of a boss fight, that fraction matters).
Before you start messing with Lcfgamestick special settings by lyncconf, you need to know what you’re actually changing. I’ve watched too many people blindly copy settings and wonder why their games run worse.
Let me break down the settings that actually move the needle.
System Governor controls how hard your hardware works. Performance mode pushes your CPU and GPU to their max clock speeds. You’ll get the smoothest gameplay but your battery drains fast and the device gets warm in your hands.
Balanced mode sits in the middle. It ramps up when you need power and backs off when you don’t.
Power Save mode keeps things cool and quiet. Great for turn-based games or visual novels where you don’t need raw horsepower.
Resolution Scaling is where things get interesting. Your screen might be 1080p, but that doesn’t mean your game has to render at 1080p. Drop the internal resolution to 720p and watch your frame rate jump. The image gets a bit softer, sure, but the difference between 30fps and 60fps? You can feel that in your fingers when you’re playing.
VSync stops that ugly screen tearing you see when frames don’t sync with your display refresh rate. The image looks cleaner, smoother. But here’s the catch. It adds a tiny bit of input lag. Most people won’t notice, but if you’re playing competitive fighters or shooters, that delay can throw off your timing.
Shader Cache works behind the scenes. When enabled, it saves compiled graphics data so your game doesn’t have to rebuild it every time. Less stuttering when you enter new areas. The difference is like night and day in open-world games.
Want better performance? Check out upgrades lcfgamestick for hardware mods that pair well with these settings.
Configuration 1: The ‘Competitive Edge’ Preset (Max FPS & Low Latency)
You want every millisecond to count.
I built this configuration for one thing. Winning. When you’re playing competitive shooters or fighting games, you can’t afford frame drops or input lag. Your opponent won’t wait while your system stutters.
This setup is what I run when I’m grinding ranked matches. It’s not pretty. But it’s fast.
Goal: Hit and hold your target FPS (60/120 FPS) with zero input delay.
Here’s what you get with this preset. Your reactions translate to screen actions instantly. No visual processing getting in the way. No frame pacing issues throwing off your timing.
Some people say you need high graphics to enjoy games. That visuals matter just as much as performance. And sure, for single-player story games, they have a point.
But in competitive play? That argument falls apart fast.
I’d rather see my enemy 16 milliseconds earlier than see their shadow rendered in 4K. You would too if you’re serious about climbing leaderboards.
Step-by-Step Settings
Start with your System Governor. Set it to ‘Performance’. This tells your lcfgamestick to prioritize speed over power saving.
Next, lock your Display Output to 1080p. Higher resolutions tank your framerate. Period.
Now here’s the big one. Turn VSync off. I know it causes screen tearing. But VSync adds input delay that you can feel in fast games. The trade is worth it.
Set Anti-Aliasing to off. Those smooth edges cost frames you can’t spare.
Switch Texture Filtering to ‘Bilinear’ or ‘Performance’. Fancy filtering looks nice in screenshots but does nothing for your K/D ratio.
Drop Shadow Quality to ‘Low’. Shadows are the biggest performance killer that most players ignore.
One more thing. Use lcfgamestick special settings by lyncconf to fine-tune frame pacing if you’re still seeing inconsistency.
Expected Trade-off
Your game will look rough. Jagged edges everywhere. Flat textures. Basic shadows.
That’s the point. You’re trading visual polish for reaction speed. Every setting you lower frees up processing power for higher framerates and faster input response.
When you land that headshot because you saw them first, you won’t care about the aliasing.
Configuration 2: The ‘Cinematic Experience’ Preset (Max Visual Fidelity)
This setup is for you if you want games to look absolutely stunning.
I’m talking about those moments in Red Dead Redemption 2 when the sun hits just right. Or when you’re exploring Elden Ring and the scenery makes you stop and stare.
Some players will tell you that anything below 120 FPS is unplayable. That you’re wasting your hardware if you’re not maxing out framerates.
But here’s what they don’t get.
Not every game needs to run at competitive speeds. Story-driven adventures and RPGs benefit way more from visual quality than raw performance. You’re not trying to land headshots. You’re trying to get lost in another world.
Goal: Push your graphics to the limit while maintaining smooth, stable gameplay at 30 or 60 FPS.
Here’s how I set it up.
Start with your System Governor. Set it to ‘Balanced’. This gives you enough power without cooking your device during those long gaming sessions.
Next, go to Display Output and select ‘Native’. If your screen supports 4K, use it. Don’t downscale here because that defeats the whole point of this preset.
Turn VSync to ‘On’ or ‘Adaptive’. Screen tearing will ruin immersion faster than anything else (trust me on this one).
Now for the heavy hitters.
Set Anti-Aliasing to ‘MSAA 4x’ or higher. This smooths out those jagged edges that break the illusion. Then crank Texture Filtering to ‘Anisotropic 16x’ so textures stay sharp even at angles.
Shadow Quality goes to ‘High’ or ‘Ultra’. Shadows add depth that flat lighting just can’t match.
Pro tip: If you’re using lcfgamestick special settings by lyncconf, you can save this entire configuration as a custom profile. Makes switching between presets way easier when you jump from single-player to multiplayer games. If this resonates with you, I dig deeper into it in Lcfgamestick Instructions From Lyncconf.
The trade-off?
Your framerates will drop compared to competitive settings. In demanding titles like Cyberpunk 2077 or Starfield, you might need to lock FPS at 30 to keep things stable.
But when you see how good it looks? Totally worth it.
Advanced Tuning: Optimizing for Emulation
I’ll be honest with you.
The first time I tried running Saturn emulation on my Gamestick, it was a mess. Choppy framerates, audio stuttering, the works. I thought maybe the hardware just couldn’t handle it.
Then I dug into the settings.
Turns out I was running everything on the default governor. That’s fine for most games, but Saturn emulation? It needs every bit of CPU power you can throw at it.
Here’s what actually works.
CPU-Intensive Systems
PS2 and Saturn emulators don’t care much about your GPU. They want raw CPU speed on a single core.
Set your System Governor to Performance mode. You’ll find this in the Lcfgamestick special settings by lyncconf menu. It keeps your CPU running at max clock speed instead of scaling up and down.
Does it drain battery faster? Yeah. But you didn’t buy a Gamestick to stare at a slideshow.
GPU-Intensive Systems
GameCube and Wii are different beasts. They hammer both your CPU and GPU at the same time.
I run these on Balanced profile. Make sure your GPU drivers are current too (check the system menu for updates). Outdated drivers killed my Metroid Prime performance until I figured that out.
Per-Emulator Profiles
Some people say just pick one setting and stick with it. That you’re overthinking things by tweaking every emulator separately.
But here’s the problem with that approach. A 2D fighter like Street Fighter III needs completely different resources than a 3D RPG like Xenoblade. Running both on the same profile means one of them is going to suffer.
The Gamestick lets you create custom profiles for each emulator. I use Competitive preset for fighting games and Balanced for RPGs. Takes five minutes to set up and you never think about it again.
The Threaded Video Setting
This one’s sneaky good on multi-core devices.
When you enable Threaded Video in your emulator settings, it offloads video processing to a separate CPU core. Smooths out performance spikes, especially in games with heavy transparency effects or particle systems.
I turn it on for anything 3D. Leave it off for 8-bit and 16-bit systems since they don’t need it.
Your Gamestick, Your Rules
You now have the settings you need.
Your Lyncconf Gamestick doesn’t have to run on someone else’s defaults anymore. You’re not stuck with a configuration that ignores what you actually care about.
I’ve shown you two paths: the Competitive Edge preset and the Cinematic Experience preset. Pick the one that matches your priorities and apply the lcfgamestick special settings by lyncconf we covered.
These aren’t just random tweaks. They’re tested configurations that pull real performance from your hardware.
Here’s what you should do: Start with one of these templates. Don’t change everything at once. Adjust one setting at a time and see how it feels. That’s how you find your perfect setup.
Your gaming experience should work for you. Not the other way around.
The hardware is capable. Now you know how to make it perform.